Traffic Lights Add-on Board
Create your own micro:bit traffic light add-on board.
Overview
By the end of this tutorial you will know what an LED is and how to connect and program them using a BBC micro:bit.
What You Will Need
- 1 x Red LED
- 1 x Yellow LED
- 1 x Green LED
- 1 x Piece of cardboard
- Copper tape / aluminium foil and glue
- 4 x Crocodile / alligator leads
- 1 x micro:bit (version 1 and 2 will work)
- 1 x Micro USB cable
- 1 x Battery pack for the micro:bit (optional)
What is an LED?

An LED or Light Emitting Diode is a semiconductor light source that emits (gives off) light when current flows through it.
An LED has a longer leg called the anode (+) and a shorter leg called the cathode (-) as shown above.
Creating the Circuit
- Place the bit of cardboard on the desk
- Take the red LED and bend the legs out to the sides. Place the LED on the cardboard with the longer leg to the right.
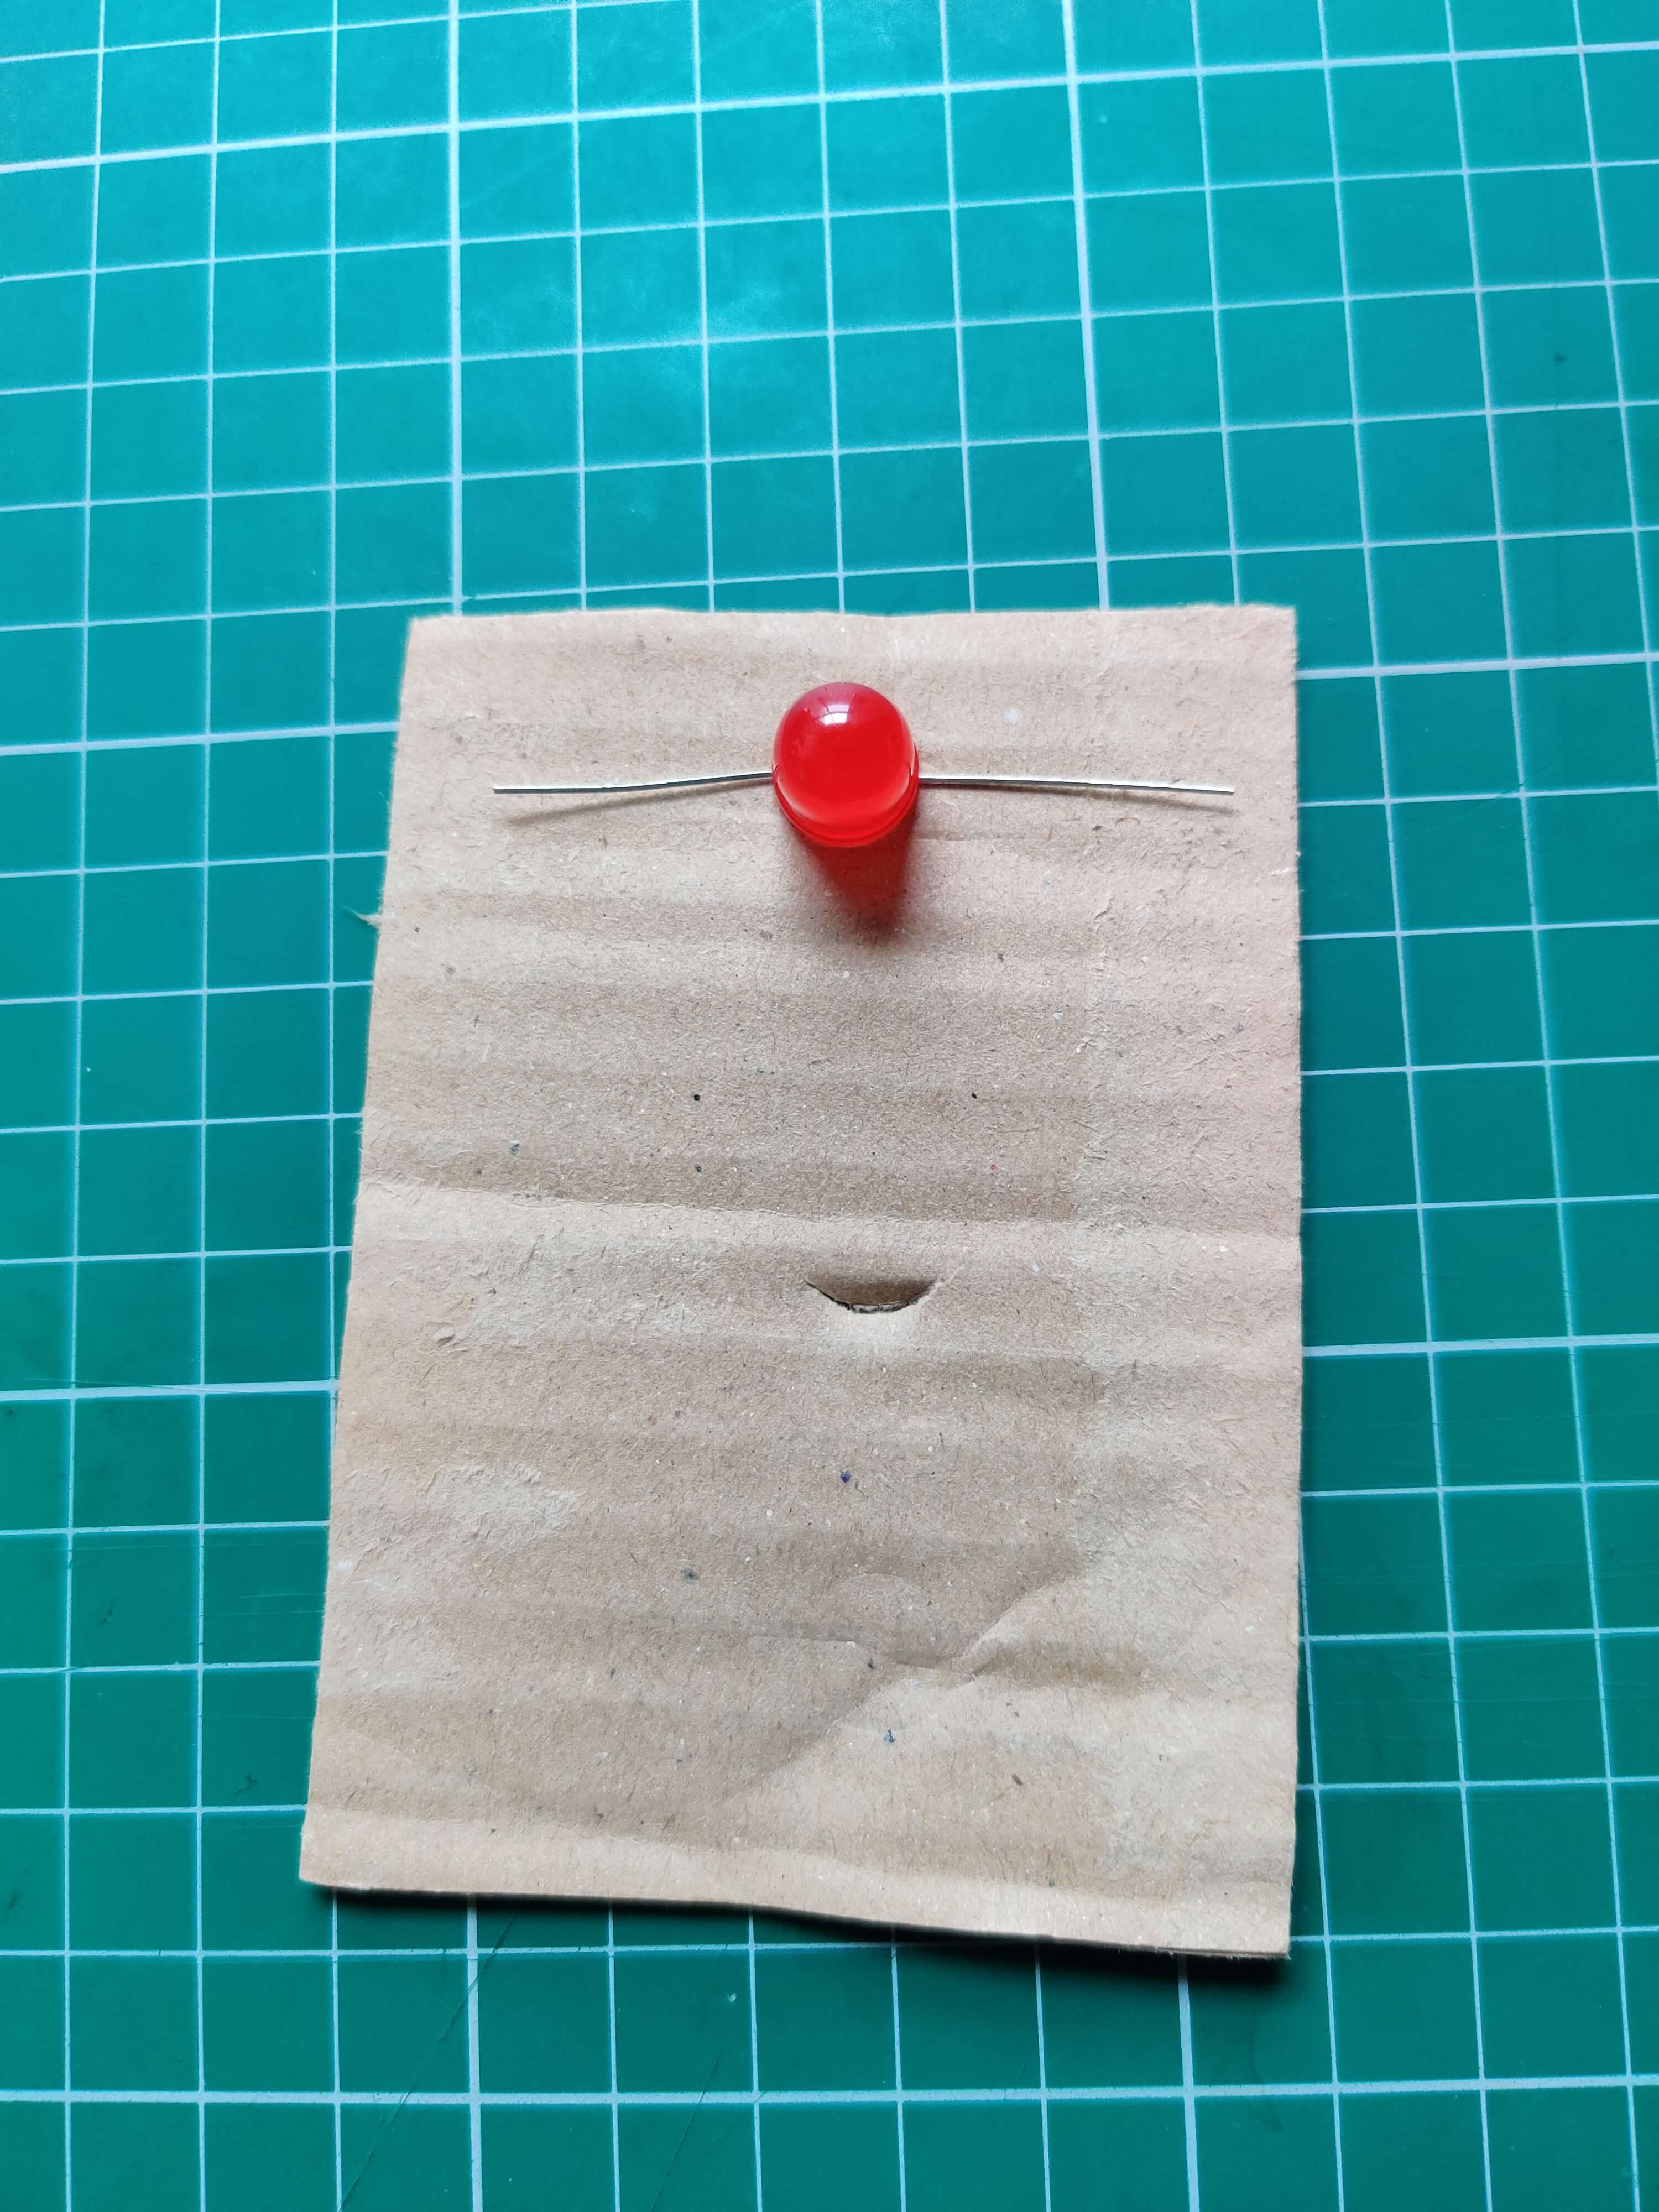
Red LED placed on the cardboard - Take a bit of copper tape or glue and some aluminium foil over the long leg of the red LED
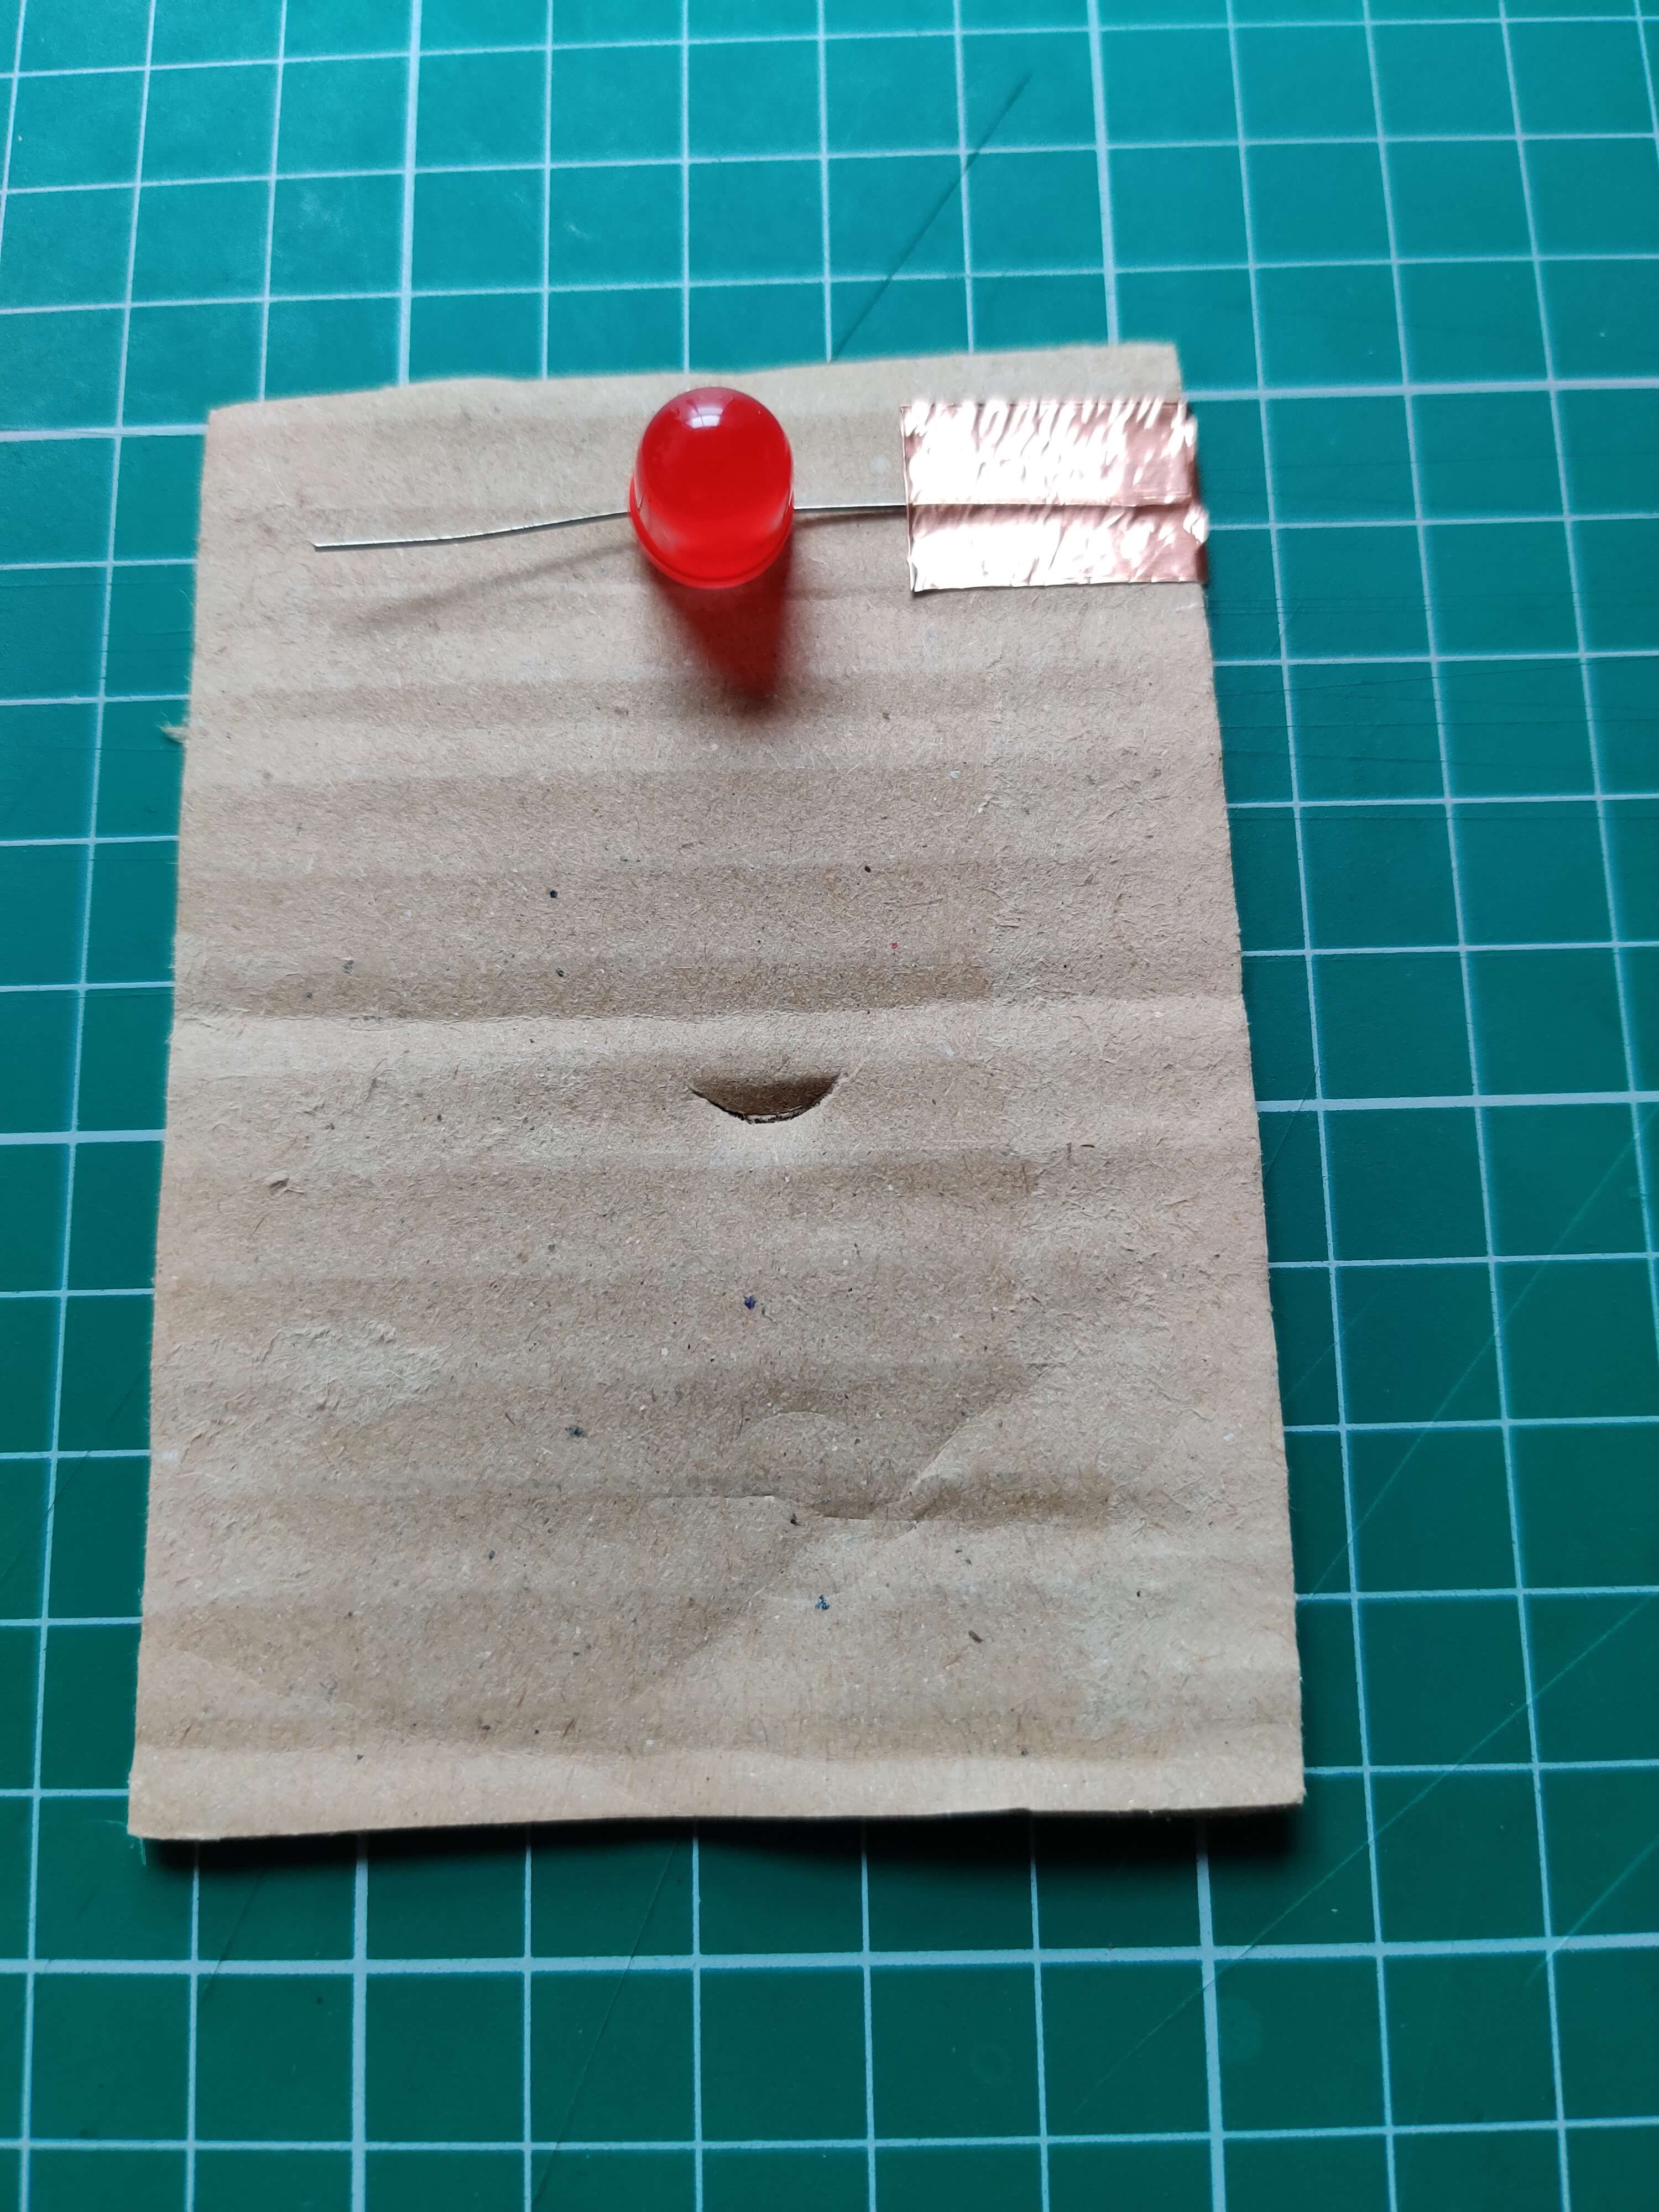
Taping the longer leg of the red LED - Complete steps 2 and 3 for the yellow and green LEDs.
- Take a longer bit of copper tape or foil and tape/glue all three of the short legs of the LEDs together.
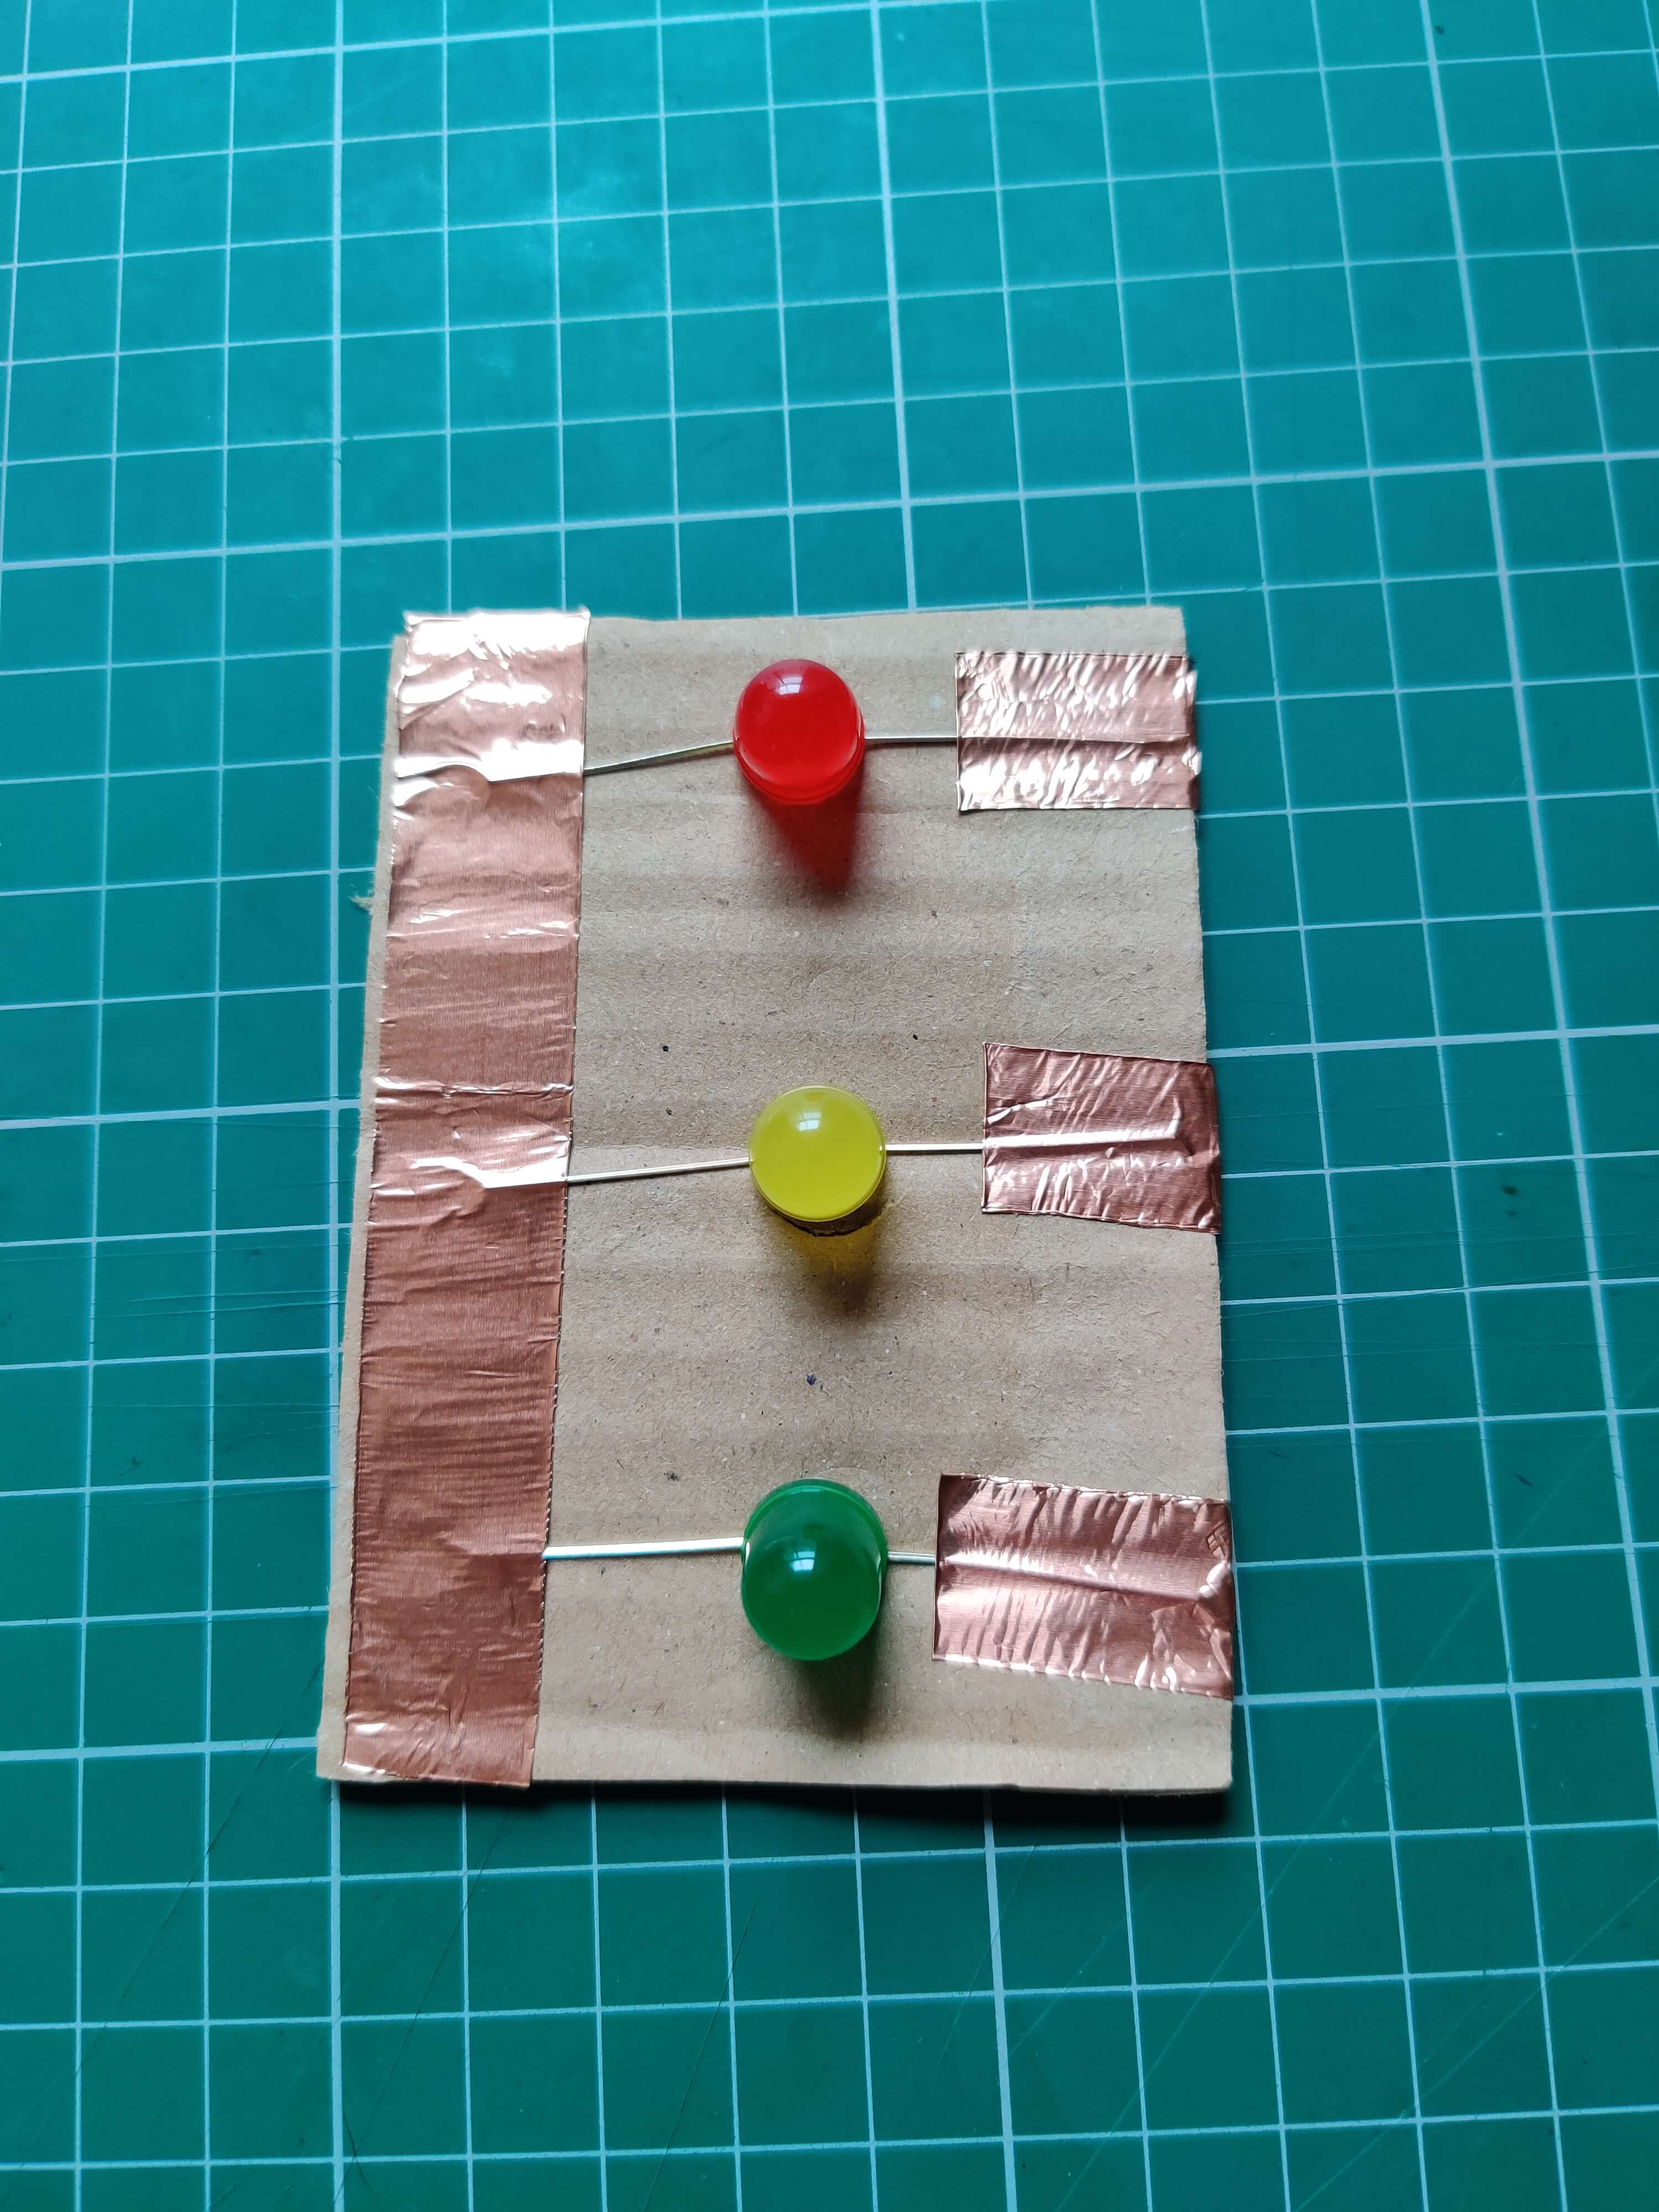
Completed Traffic lights
Connecting to the micro:bit
- Take one of the crocodile/alligator leads and clip one end to the long piece of copper tape/aluminium foil covering the short legs of the LEDs and clip the other end to the GND pin of the micro:bit.
- Take another crocodile/alligator lead and clip one end to the copper tape/aluminium foil of the longer leg of the red LED and attach the other end to pin 0 on the micro:bit.
- Take another crocodile/alligator lead and clip one end to the copper tape/aluminium foil of the longer leg of the yellow LED and attach the other end to pin 1 on the micro:bit.
- Take the last crocodile/alligator lead and clip one end to the copper tape/aluminium foil of the longer leg of the green LED and attach the other end to pin 2 on the micro:bit.
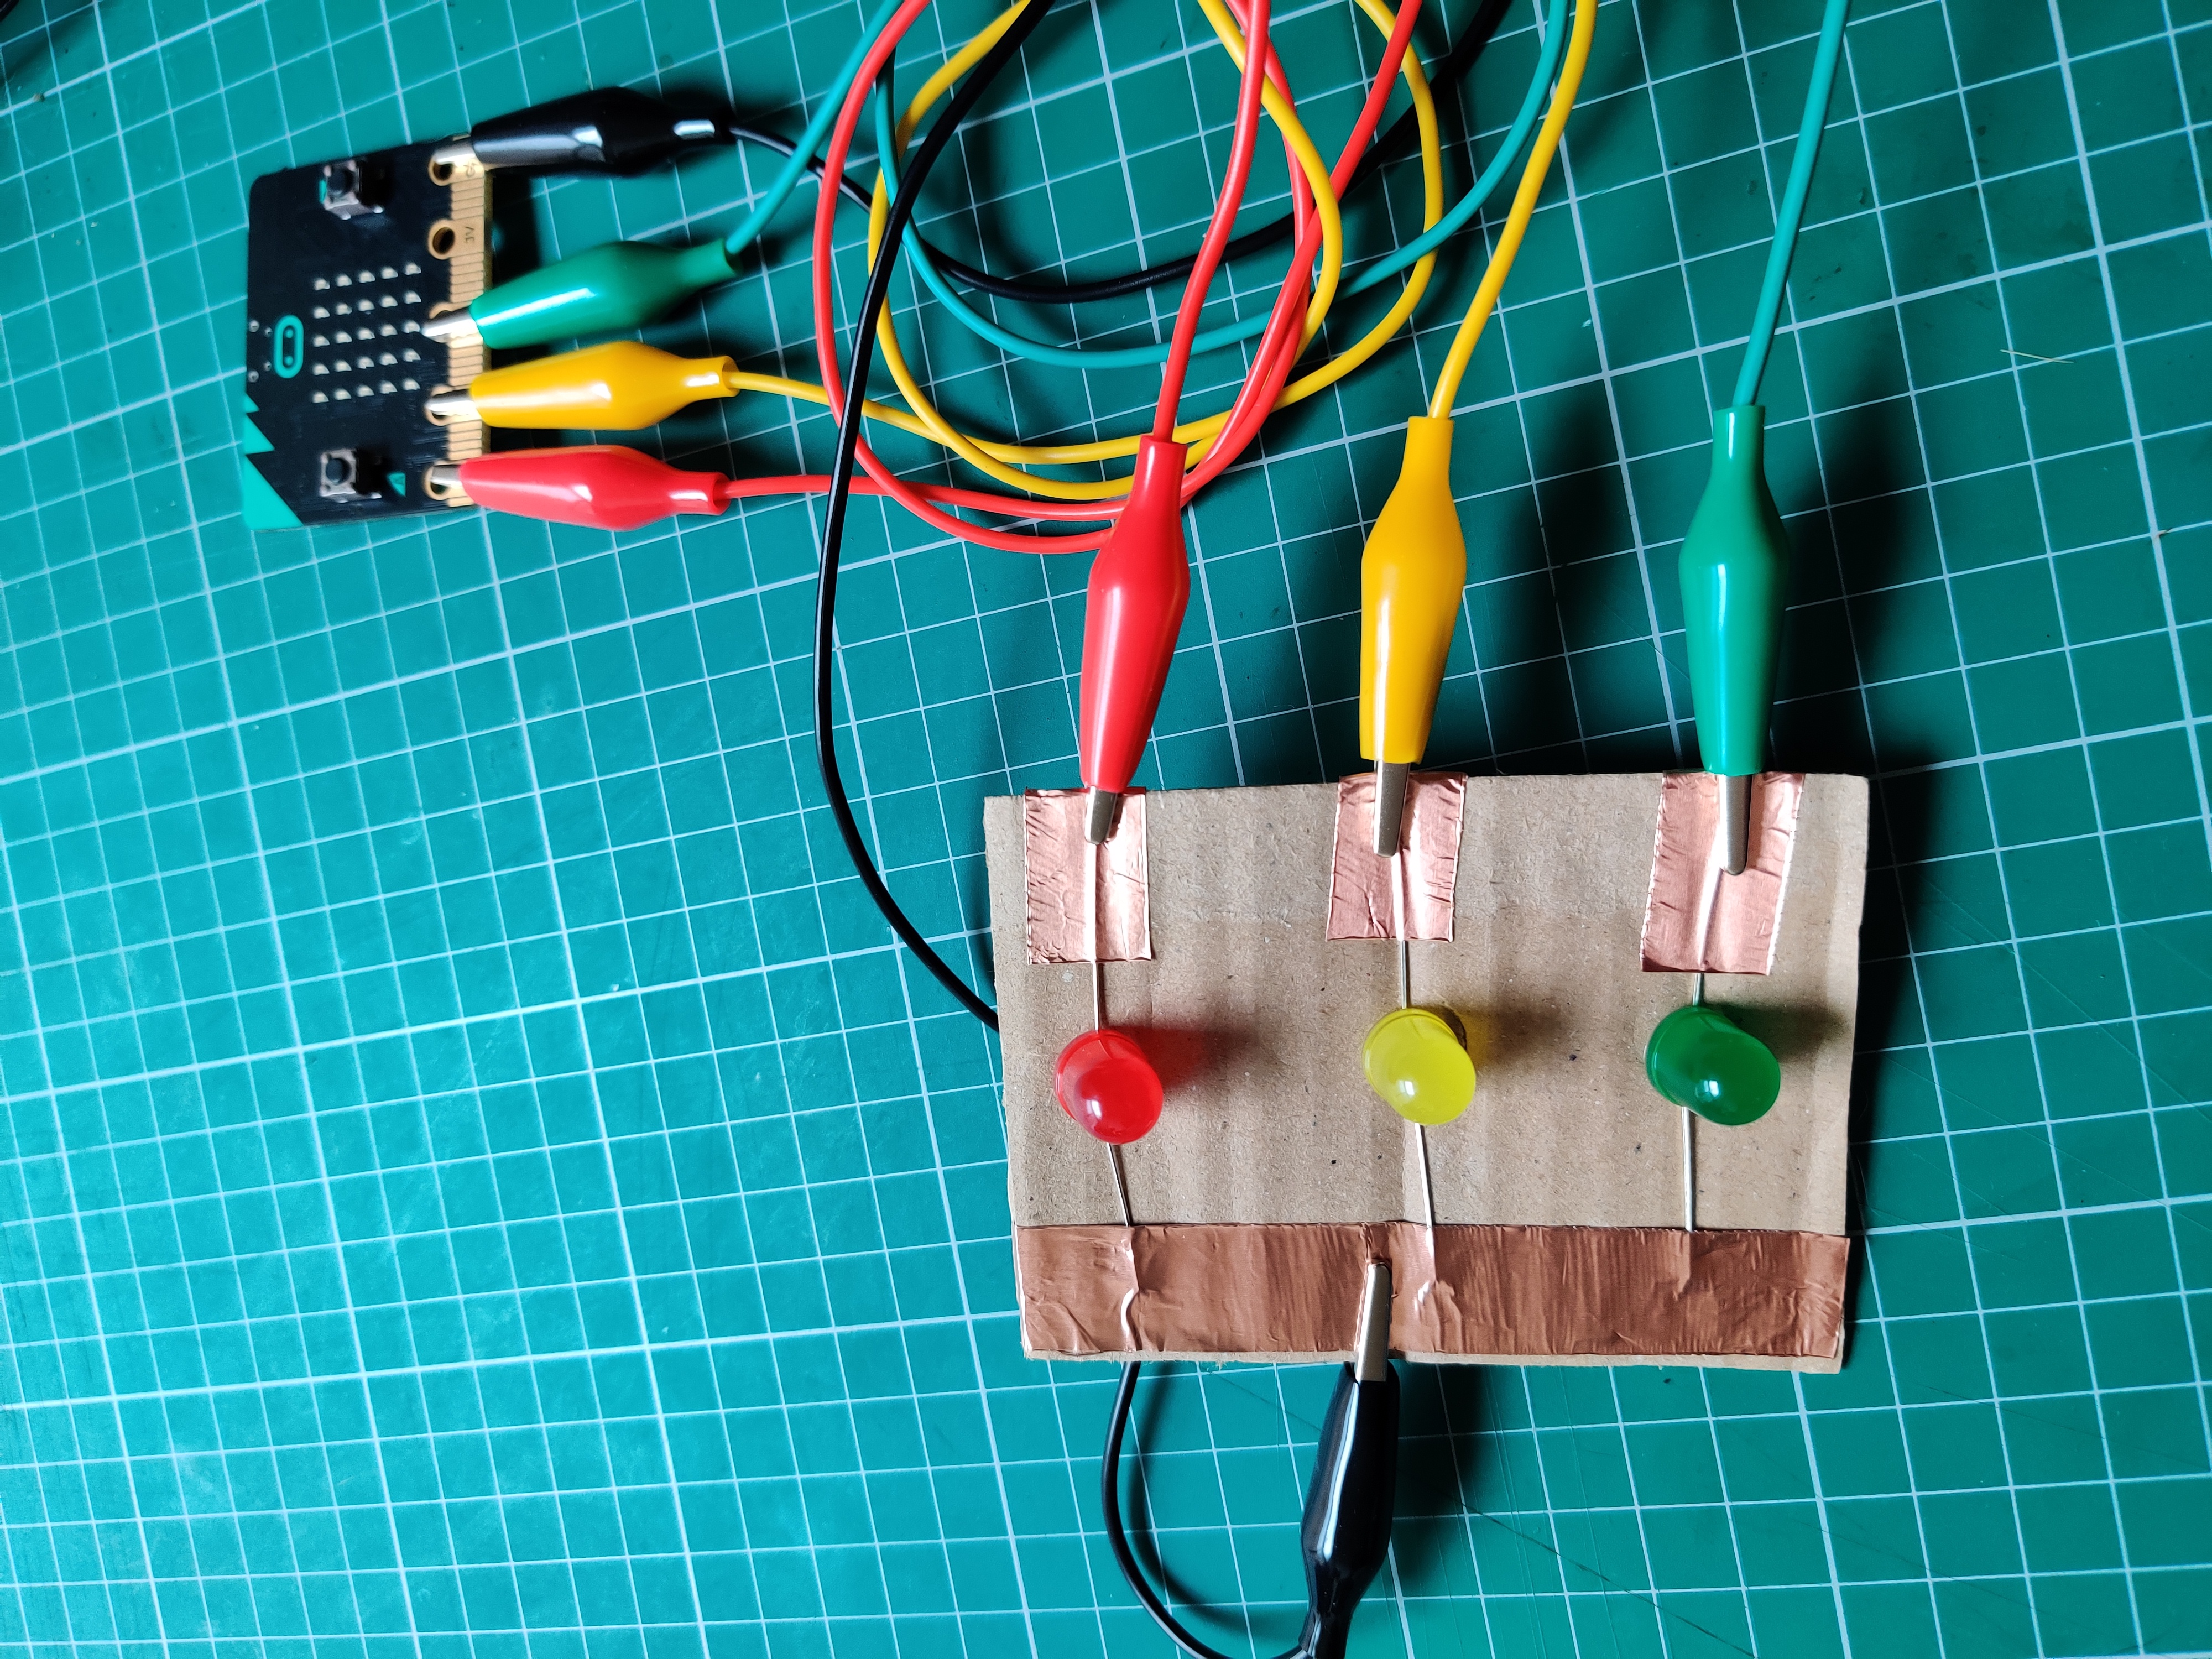
We are now ready to code our traffic lights
Coding The Traffic Lights
- Within your favourite browser (we recommend Google Chrome) go to app.edublocks.org and press Enter . This will load the EduBlocks coding environment.
- Click on micro:bit and click start coding to open the EduBlocks coding editor for micro:bit.
- Click on Basic . Click and drag a from microbit import * block to the code area and drop it or if you are using the new editor attach it to the # start code here block.
- Click on Basic . Click and drag a while True: block to the code area and attach it under the from microbit import * block.
- Click on Pins . Click and drag a pin0.write_digital(0) block to the code area and attach it within the while True: block.
- Click on the 2nd 0 within the pin0.write_digital block and type 1 .
- Click on Basic . Click and drag a sleep (1000) block to the code area and attach it under pin0.write_digital(1) block. Your code should look like this:
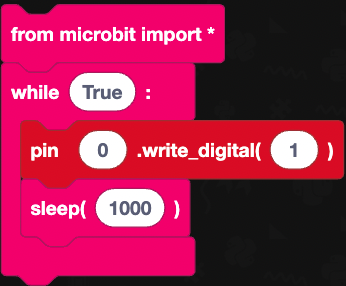
Turning the red LED on - Right-click on pin0.write_digital(1) block and click duplicate attach the duplicated block under sleep (1000) block. Click on the 0 and type 1 .
- Right-click on sleep (1000) and click duplicate attach the duplicated block under the pin1.write_digital(1) block. Your code should look like this:
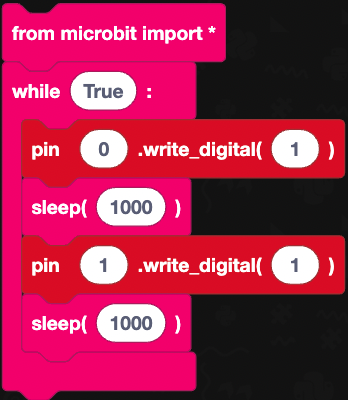
Turning the yellow LED on - Right-click on the pin0.write_digital(1) and click duplicate attach the duplicated block under sleep (1000) . Click on 1 and type 0 .
- Right-click on pin1.write_digital(1) and click duplicate attach the duplicated block under pin0.write_digital(0) block. Click on the 2nd 1 and type 0 .
- Right-click on pin1.write_digital(1) block and click duplicate attach the duplicated block under pin1.write_digital(0) block. Click on the 1st 1 and type 2 .
- Right Click on sleep (1000) and click on duplicate attach the duplicated block under pin2.write_digital(1) . Your code should look like this:
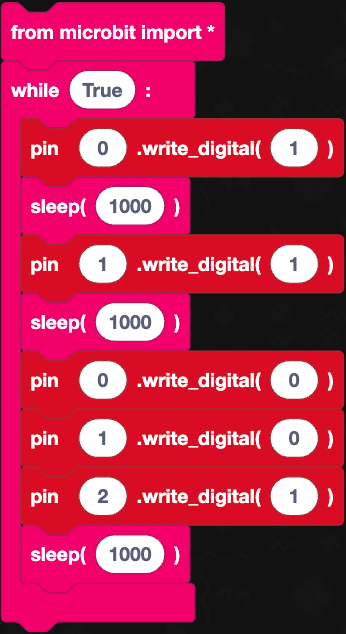
Turning the red and yellow LEDs off and the green LED on - Right-click on pin2.write_digital(1) and click duplicate attach the duplicated block under sleep (1000) . Click on 1 and type 0 .
- Right-click on pin1.write_digital(1) block and click duplicate attach the duplicated block under pin2.write_digital(0) block.
- Right-click on sleep (1000) and click duplicate attach the duplicated block under pin1.write_digital(1) block.
- Right-click on pin1.write_digital(0) block and click duplicate attach the duplicated block under the sleep (1000) block.
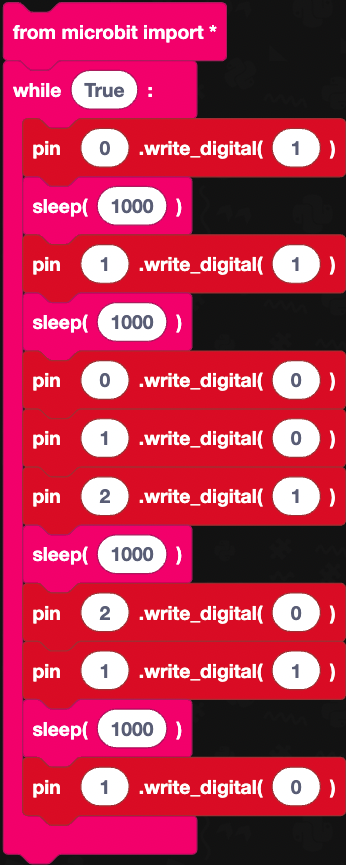
Now that we have completed the code we need to download it to our micro:bit
Downloading the Code
- Attach the micro:bitt to the computer using the micro USB cable.
- Click on the Download Hex button.
- Locate your micro:bit within the file manager and click on it to open the drive and click save to download your code to the micro:bit.
Well-done! You have just created and coded your own micro:bit add-on board.
