
Overview
In this project we'll build our very own automatic light, just like the ones that switch themselves on when it gets dark. We'll use the Light SensorA light sensor is a little part that measures how bright or dark it is around it, then turns that into a number your code can read. As the light changes, so does the number.Full entry → to measure how bright it is around us. When it gets too dark, the RGB LEDAn RGB LED is a tiny light that can glow in any colour you like. It mixes red, green and blue light in different amounts, a bit like mixing paints, to make all sorts of colours.Full entry → will switch on all by itself, and when it's bright again, it turns back off.
What you'll learn
- How a light sensor measures the light around it
- How to use an if/else block to make a decision
- How to switch an RGB LED on and off automatically
What you'll need
- PicoBricks Kit
- PicoBricks Brick IDE
- MicroUSB to USB cable
- Laptop or tablet for coding
Key words
Light Sensor
A light sensor is a little part that measures how bright or dark it is around it, then turns that into a number your code can read. As the light changes, so does the number.
Real-world example: Like the automatic headlights on a car that switch on when it gets dark, a light sensor notices the light dropping and lets your code react.
RGB LED
An RGB LED is a tiny light that can glow in any colour you like. It mixes red, green and blue light in different amounts, a bit like mixing paints, to make all sorts of colours.
Real-world example: Like the colour-changing lights some people put behind their TV, an RGB LED can shift from red to green to blue and everything in between.
Forever loop
A forever loop repeats its instructions again and again without ever stopping (until you switch off or reset). It's perfect for anything you want to keep happening over and over.
Real-world example: Like a clock's second hand that keeps ticking round and round, a forever loop keeps running the same steps over and over.
If statement
An if statement checks whether something is true, and only runs its instructions when it is. It's how code makes decisions.
Real-world example: "If it's cold, put on a coat." If it's warm, you skip the coat, the action only happens when the check is true.
Threshold
A threshold is a cut-off number you pick to help your code make a decision. The code checks whether a value is above or below it, then acts. It's like drawing a line and asking "are we over it or under it?"
Real-world example: Like setting a bedtime of 8 o'clock: before 8 you're still up, after 8 it's lights out. The time is your threshold.
Set up your PicoBricks
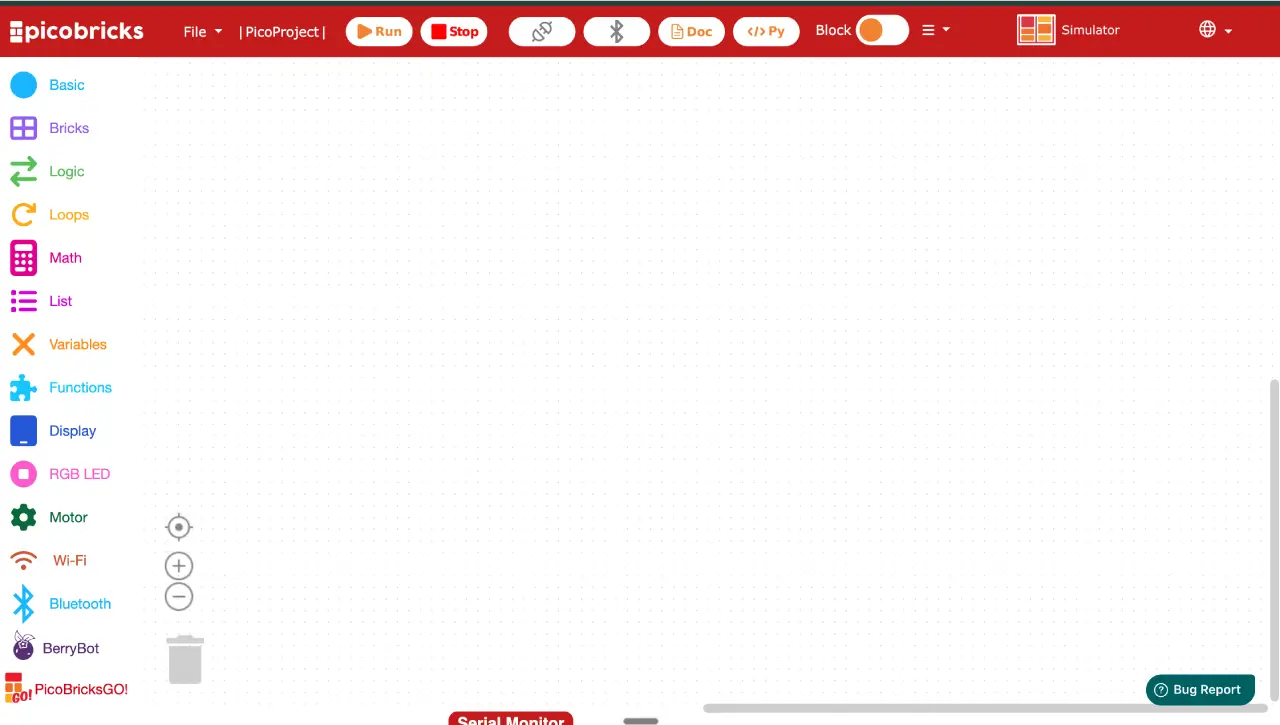
- Open your favourite web browser. We recommend either Google Chrome or Microsoft Edge. Type ide.picobricks.com into the address bar.
- Connect the PicoBricks board to your computer using the USB cable.
- Connect the PicoBricks board to the Brick IDE by selecting the Connection button at the top of the code area.
Build the code
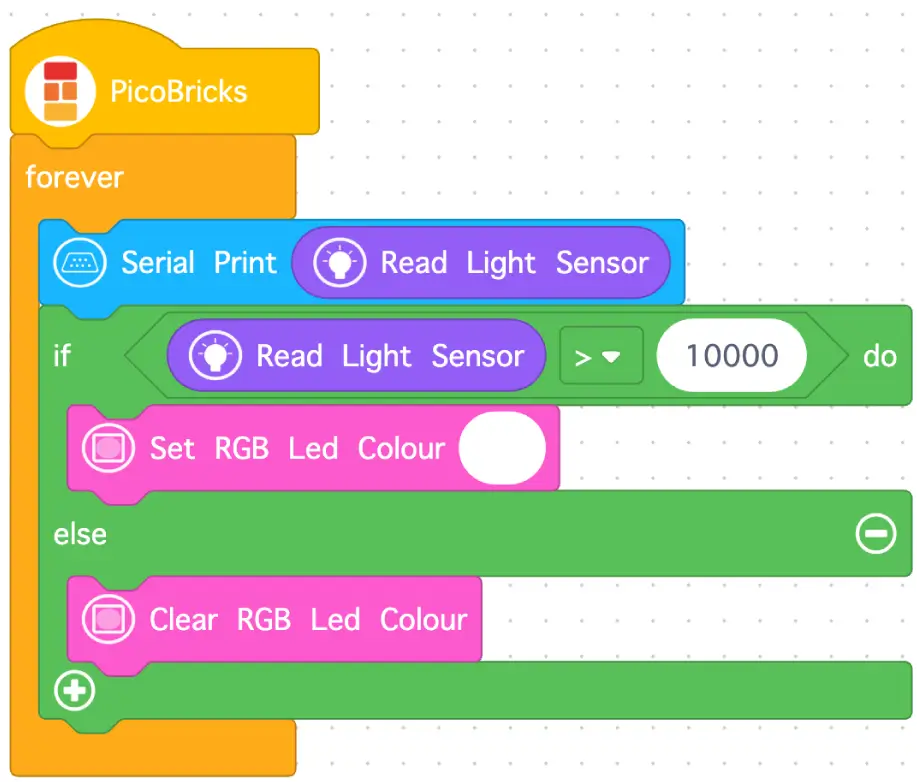
- Select Basic. Drop a
PicoBricksblock into the code area. - Select Loops. Snap a Forever loopA forever loop repeats its instructions again and again without ever stopping (until you switch off or reset). It's perfect for anything you want to keep happening over and over.Full entry → block to the
PicoBricksblock. - Select Basic. Snap a
Serial Printblock inside theforeverblock. - Select Bricks. Snap a
Read Light Sensorblock onto theSerial Printblock where it says PicoBricks. - Select Logic. Snap an If statementAn if statement checks whether something is true, and only runs its instructions when it is. It's how code makes decisions.Full entry → block to the
Serial Print Read Light Sensorblock. - Select Logic. Snap an
=block onto theifblock, then change the = to a >. - Select Bricks. Add a
Read Light Sensorblock into the first blank space of theifblock, before the >. - Select Math. Snap a
0block into the space after the >, then change 0 to 10,000. - Select RGB LED. Snap a
Set RGB Led Colourblock inside theifblock. - Select RGB LED. Snap a
Clear RGB Led Colourblock inside theelseblock.
Run it and Watch
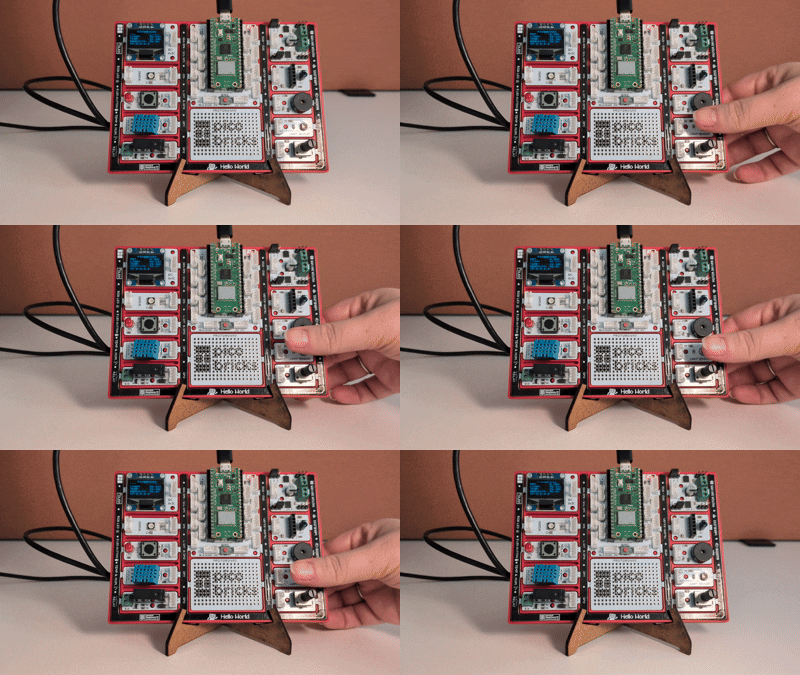
Now the code is finished, let's run it and check it works. Select the run button at the top of the code area. If it's daylight the RGB LED should be off. If it's night time, or if you cover the light sensor with your hand, the RGB LED will turn on.
Try it yourself
Challenge: Can you make your night light more colourful? Try changing the Set RGB Led Colour block to a different colour, so your light glows blue, green or purple when it gets dark. Feeling brave? Add a Buzzer block so it gives a gentle beep the moment the light comes on.
Stuck? Quick fixes
| Problem | Try this |
|---|---|
| The RGB LED won't turn on at all | Cover the light sensor fully with your hand to make it really dark. If it still won't light up, your room might not get dark enough to push the reading past the cut-off, so try lowering the 10,000 value in your if block. |
| The RGB LED is always on | Your everyday room light is already reading above the cut-off. Try raising the 10,000 value so the light only comes on when it's properly dark. |
| Nothing happens when I press Run | Check the PicoBricks board is connected (the connection button at the top should show it's linked). Unplugging and replugging the USB cable often does the trick. |
| I can't see the light readings | Make sure the Serial Print block is inside the forever loop, with the Read Light Sensor block snapped into it. |