
Overview
In computer programming, when learning a new coding language we typically create a Hello World project, which prints Hello World to the screen.
When working with robotics and physical computing, our Hello World project becomes a blinking LEDAn LED is a tiny light you can switch on and off (and sometimes change colour) with your code. LED is short for "light-emitting diode".Full entry → (light-emitting diode).
Let's take a look at how we'd create this on the PicoBricks using the Brick IDE.
What you'll learn
- How to make an LED blink on and off
What you'll need
- PicoBricks Kit
- PicoBricks Brick IDE
- MicroUSB to USB cable
- Laptop or tablet for coding
Key words
LED
An LED is a tiny light you can switch on and off (and sometimes change colour) with your code. LED is short for "light-emitting diode".
Real-world example: The little standby light on a TV is an LED, your code can flash one on and off the same way.
Forever loop
A forever loop repeats its instructions again and again without ever stopping (until you switch off or reset). It's perfect for anything you want to keep happening over and over.
Real-world example: Like a clock's second hand that keeps ticking round and round, a forever loop keeps running the same steps over and over.
Set up your PicoBricks
- Open your favourite web browser. We recommend either Google Chrome or Microsoft Edge. Type ide.picobricks.com into the address bar.
- Connect the PicoBricks board to your computer using the USB cable.
- Connect the PicoBricks board to the Brick IDE by selecting the Connection button at the top of the code area.
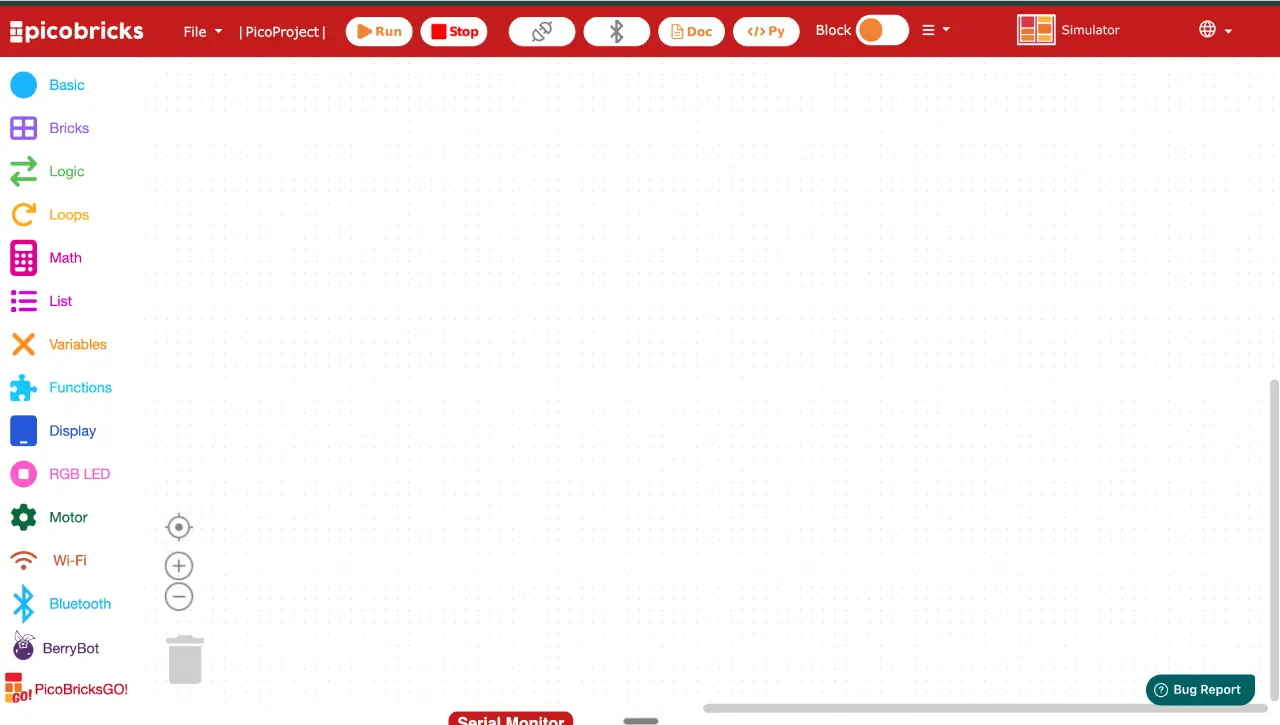
Build the code
- Select Basic. Select a
PicoBricksblock and drop it in the code area. - Select Loops. Select a
foreverblock and snap it to thePicoBricksblock. - Select Bricks. Select a
Set Ledblock and snap it within theforeverblock. It will be set to on by default. - Select Loops. Select a
waitblock and snap it to theSet Led onblock. Change the 1 to 0.5. - Select Bricks. Select a
Set Ledblock and snap it to thewait 0.5block. Change the on to off. - Select Loops. Select a
waitblock and snap it to theSet Led offblock. Change the 1 to 0.5.
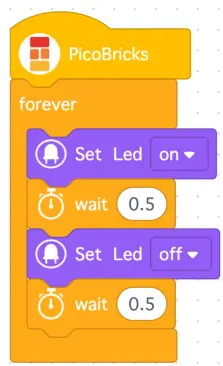
We've now completed the code for our blinking LED.
Run it and watch
- Select the run button at the top of the code window.
Your LED should now blink on and off every half a second. 🎉
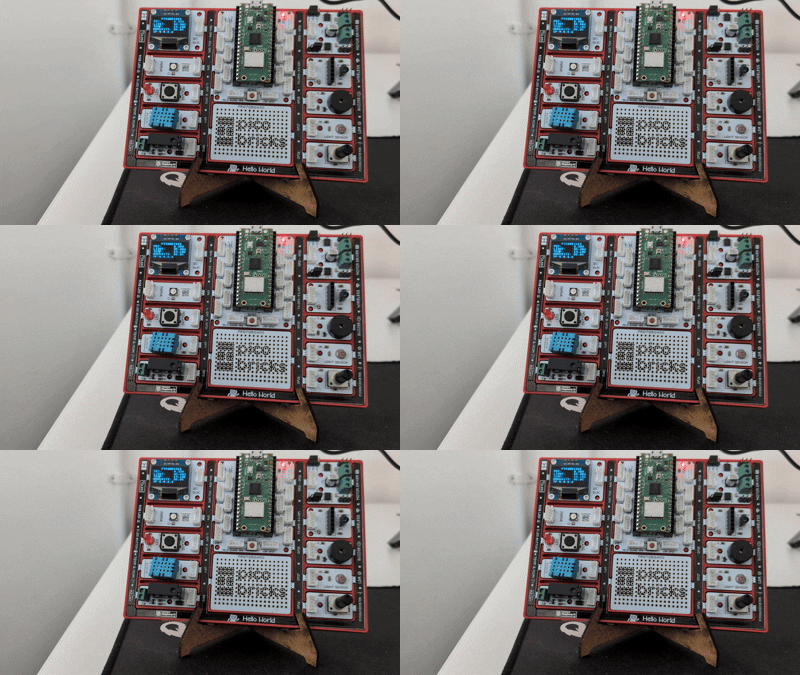
Try it yourself
Challenge: Can you make your LED blink faster or slower? Try changing both wait 0.5 blocks to a smaller number like 0.1 for a speedy flash, or a bigger number like 1 for a slow, sleepy blink. What happens if you give the two waits different numbers?
Stuck? Quick fixes
| Problem | Try this |
|---|---|
| The LED isn't lighting up at all | Check the USB cable is pushed in properly at both ends, and make sure the Brick IDE shows it's connected to your PicoBricks board. |
| The blocks won't snap together | Make sure each block is dropped just inside the one above it. The Set Led and wait blocks need to sit inside the forever loop, not below it. |
| The LED comes on but never turns off | Check your second Set Led block is set to off, and that a wait block sits after each Set Led block. |
| Nothing happens when I press run | Try reconnecting the board, then press run again. Unplugging the USB cable and plugging it back in often helps too. |