
Overview
In this tutorial we're going to use the RGB LEDAn RGB LED is a tiny light that can glow in any colour you like. It mixes red, green and blue light in different amounts, a bit like mixing paints, to make all sorts of colours.Full entry → and the PotentiometerA potentiometer is a knob or dial that controls how much electricity flows through a circuit. Think of it like a tap for water: turn it one way and more comes out, turn it the other way and less comes out.Full entry → on the PicoBricksPicoBricks is an all-in-one coding kit that joins up handy parts, like a screen, a buzzer, buttons and lights, onto one board, so you can build projects without any fiddly wiring.Full entry → board to make a dimmable lighting system.
What you'll learn
- How to control the RGB LED using the potentiometer.
What you'll need
- PicoBricks
- Raspberry Pi Pico
- USB to MicroUSB cable
What you'll need
Potentiometer
A potentiometer is a knob or dial that controls how much electricity flows through a circuit. Think of it like a tap for water: turn it one way and more comes out, turn it the other way and less comes out.
Real-world example: A volume dial on a speaker is a potentiometer, turn it up for louder sound and down for quieter.
RGB LED
An RGB LED is a tiny light that can glow in any colour you like. It mixes red, green and blue light in different amounts, a bit like mixing paints, to make all sorts of colours.
Real-world example: Like the colour-changing lights some people put behind their TV, an RGB LED can shift from red to green to blue and everything in between.
Variable
A variable is something that can change. Think of it like a labelled box: you pop something inside, and the label tells you what it is. You can swap what's inside whenever you like.
Real-world example: A variable called score might start at 0, then change to 1, 2 and 3 as you collect points in a game.
Forever loop
A forever loop repeats its instructions again and again without ever stopping (until you switch off or reset). It's perfect for anything you want to keep happening over and over.
Real-world example: Like a clock's second hand that keeps ticking round and round, a forever loop keeps running the same steps over and over.
Set up your PicoBricks
- Connect the PicoBricks board to your computer using the USB cable.
- Open your favourite web browser (we recommend Google Chrome or Microsoft Edge), go to ide.picobricks.com and select PicoBlockly.
- Connect the board to the coding environment by selecting the connect button at the top of the code area.
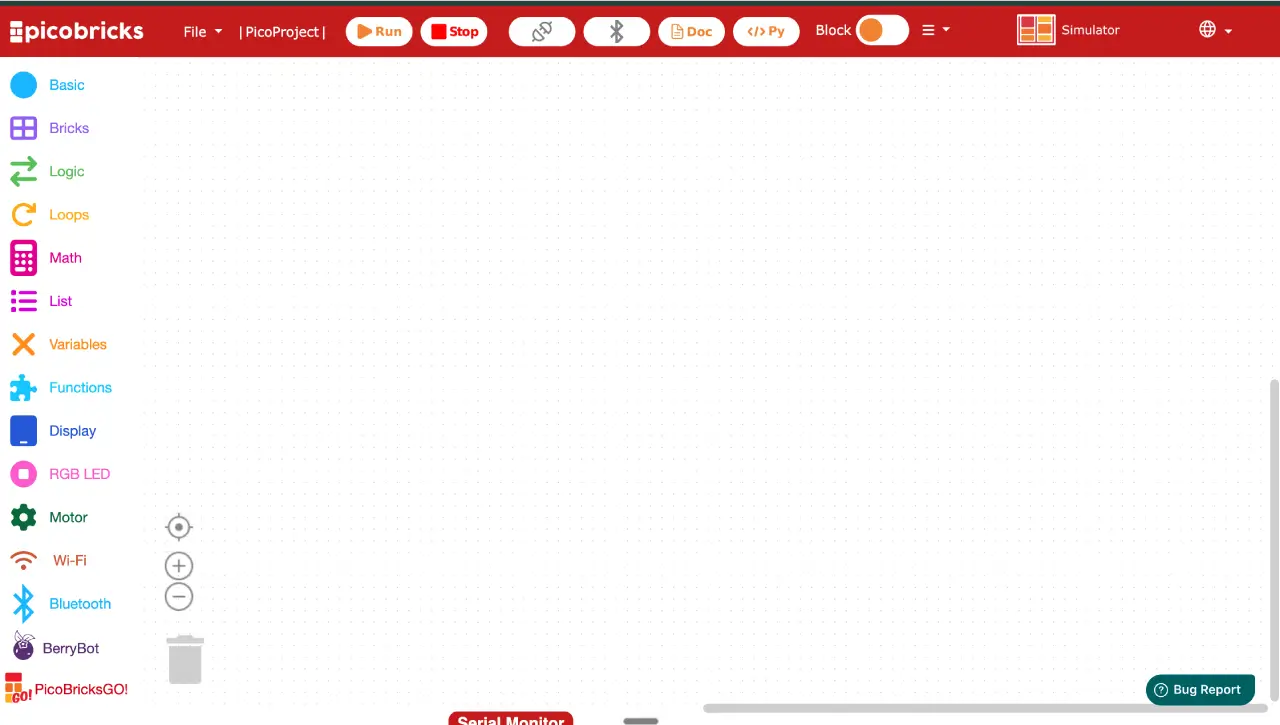
Build the code
- Select Basic. Drag a
PicoBricksblock into the code area. - Select Loops. Snap a
foreverblock onto the `PicoBricks` block. - Select Variables. Select Create variable and type Colour. Snap a
set Colour toblock inside the forever block. - Select Math. Snap a
roundblock onto theset Colour toblock. - Select Math. Snap a
1 + 1block onto theroundblock, then change the + to a x. - Select Bricks. Snap a
Read Potentiometerblock onto theroundblock, before the x sign. - Select Math. Snap another
1 + 1block onto theroundblock, after the x. Change the first 1 to 255, the + to ÷ and the remaining 1 to 65535. - Select RGB LED. Snap a
Set RGB Led Colour R 255 G 255 B 255block under theset Colour toblock. - Select Variables. Snap a
Colourblock into the R value of theSet RGB Led Colourblock. - Do the same as step 9 for the G and B values.
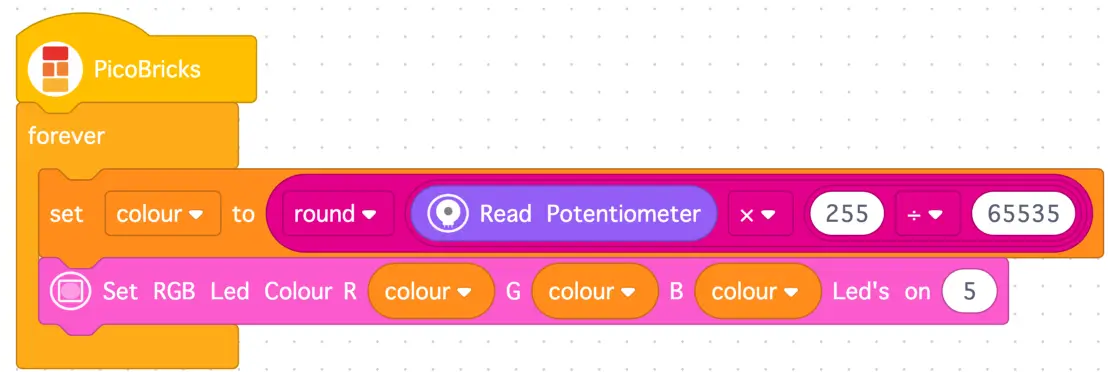
Run it and Watch
Now the code's finished, let's test it. Select the Run button at the top of the code area. Turn the potentiometer to see the LED get brighter or dimmer, right down until it goes out, depending on which way you turn it.
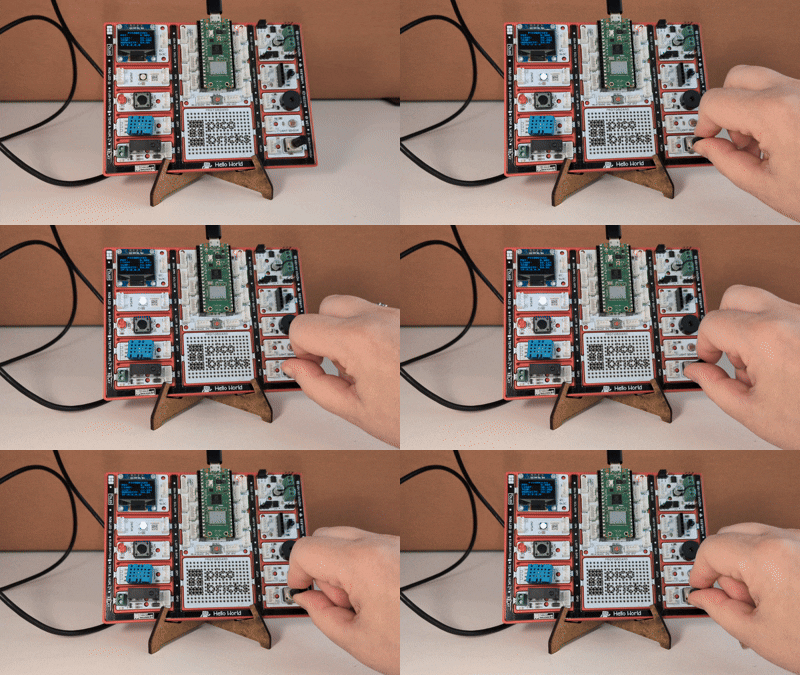
Try it yourself
Challenge: Can you make your dial control just one colour? Try setting the G and B values to `0` and leave only the R value linked to the potentiometer, so your knob fades a red glow from bright to off. Then have a go at swapping it to just green, or just blue. What happens if you mix two colours together?
Stuck? Quick fixes
| Problem | Try this |
|---|---|
| The LED doesn't light up at all | Check PicoBricks is connected using the connect button at the top of the code area, then press Run again. |
| The brightness doesn't change when you turn the dial | Check your `Read Potentiometer` block is inside the `round` block, just before the x, and that the maths reads `x 255 ÷ 65535`. |
| The colour looks wrong or flickers | Make sure the same `Colour` variable is dropped into all three slots (R, G and B). |
| PicoBricks won't connect | Try a different USB cable or port, check you picked PicoBlockly, and press the connect button again. |