
Overview
Within this PicoBricks tutorial we're going to use the Temperature sensorA temperature sensor is a little part that measures how warm or cold it is around it, then turns that into a number your code can read. As the room heats up or cools down, the number changes too.Full entry → to sense the temperature of the room you're in. The temperature is then outputted to the OLED screenAn OLED screen is a small display that shows words, numbers and pictures from your code. On some kits it's labelled the "LED display", but it's the same little screen.Full entry →.
What you'll learn
- How to sense the temperature of a room through code
- How to output the temperature to the OLED screen
What you'll need
- PicoBricks Kit
- PicoBricks Brick IDE
- MicroUSB to USB cable
- Laptop or tablet for coding
Key words
Temperature sensor
A temperature sensor is a little part that measures how warm or cold it is around it, then turns that into a number your code can read. As the room heats up or cools down, the number changes too.
Real-world example: Like the thermometer that tells you if you've got a temperature when you're poorly, a temperature sensor measures the warmth around it and gives your code a number to work with.
OLED screen
An OLED screen is a small display that shows words, numbers and pictures from your code. On some kits it's labelled the "LED display", but it's the same little screen.
Real-world example: Like the small screen on a fitness watch showing your steps, an OLED screen can show a score or a countdown.
Forever loop
A forever loop repeats its instructions again and again without ever stopping (until you switch off or reset). It's perfect for anything you want to keep happening over and over.
Real-world example: Like a clock's second hand that keeps ticking round and round, a forever loop keeps running the same steps over and over.
Set up your PicoBricks
- Open your favourite web browser. We recommend either Google Chrome or Microsoft Edge. Type ide.picobricks.com into the address bar.
- Connect the PicoBricks board to your computer using the USB cable.
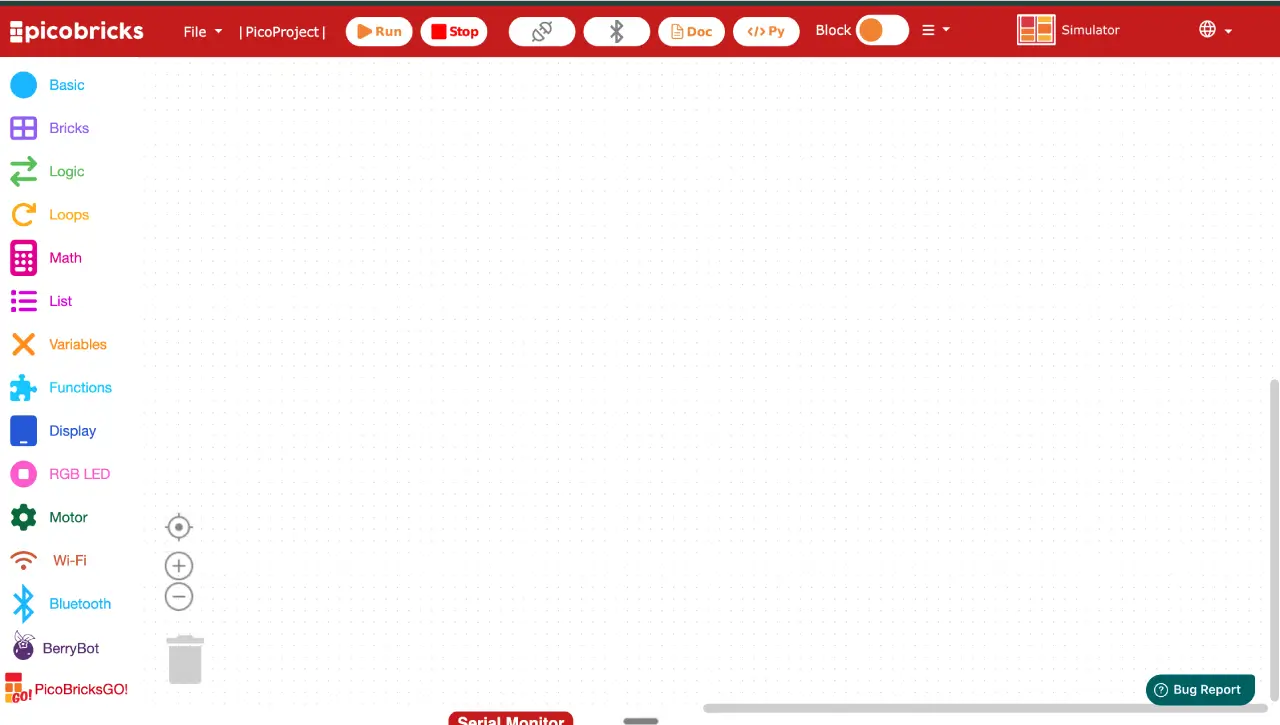
- Connect the PicoBricks board to the Brick IDE by selecting the Connection button at the top of the code area.
Build the code
- Select Basic. Select a
PicoBricksblock and drop it in the code area. - Select Loops. Select a
foreverblock and snap it to thePicoBricksblock. - Select Display. Select a
Clear Screen Bufferblock and snap it within theforeverblock. - Select Display. Select a
Write Text to Screenblock and snap it to theClear Screen Bufferblock. Change the X value to 15, the Y value to 10 and PicoBricks to Temperature:. - Select Display. Select a
Write Text to Screenblock and snap it to theWrite Text to Screen X 15 Y 10 "Temperature:"block. Change the X value to 55 and the Y value to 30. - Select Bricks. Select a
Read Temperatureblock and snap it onto theWrite Text to Screenblock where it says PicoBricks. - Select Display. Select a
Write Text to Screenblock and snap it to theWrite Text to Screen X 55 Y 30 Read Temperatureblock. Change the X value to 35, the Y value to 50 and PicoBricks to Degrees. - Select Display. Select a
Show Screen Bufferblock and snap it to theWrite Text to Screen X 35 Y 50 "Degrees"block. - Select Loops. Select a
waitblock and snap it to theShow Screen Bufferblock.
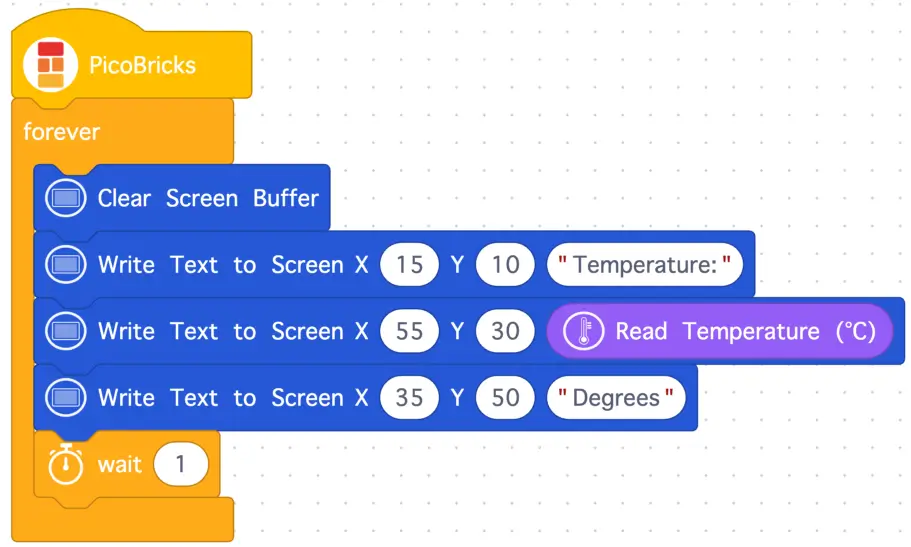
We've now completed the code for our temperature monitor.
Run it and watch
- Select the run button at the top of the code window.
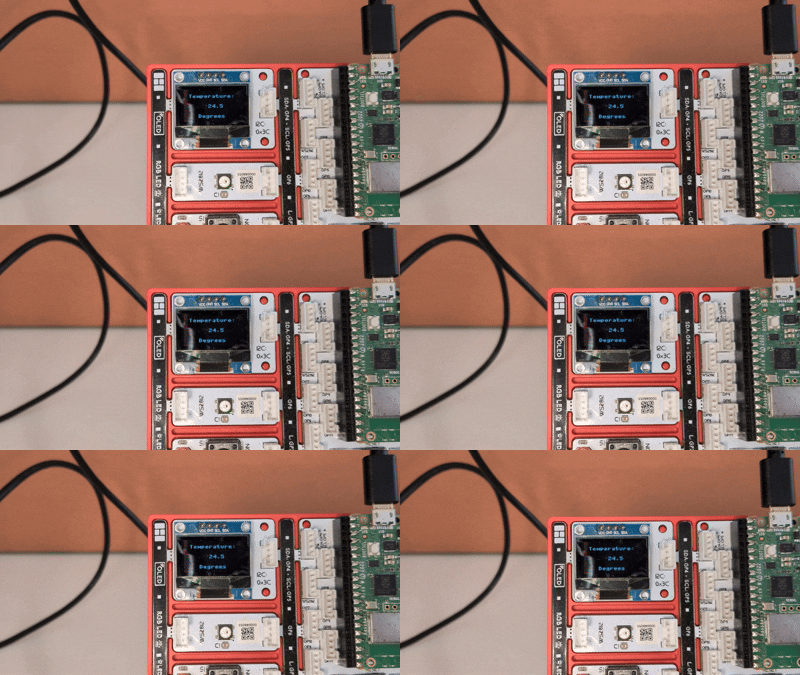
You should now see the live temperature displayed on the OLED screen. 🎉
Try it yourself
Challenge: Can you make your project react to the temperature? Try adding an if statement so the screen shows a message like Too hot! when the temperature climbs above a number you choose (your threshold). For an extra challenge, light up an LED whenever the room gets warm.
Stuck? Quick fixes
| Problem | Try this |
|---|---|
| PicoBricks won't connect, or the connect button stays greyed out | Check the USB cable is pushed in at both ends, click the Connection button at the top of the code area, and use Google Chrome or Microsoft Edge. |
| Nothing appears on the OLED screen | Make sure your Clear Screen Buffer and Show Screen Buffer blocks are in place, and that all your blocks are snapped inside the forever loop. |
| The temperature shows once but never changes | Check the Read Temperature block is snapped into the Write Text to Screen block, and that a wait block sits inside the forever loop so it keeps refreshing. |
| The words overlap or sit in the wrong place | Have a look at your X and Y values, they set where each piece of text sits on the screen. |