
Overview
Within this guide we're going to use the push ButtonA button is a switch you press to tell your project to do something. The code can check whether it's being pressed or not.Full entry → to control an LEDAn LED is a tiny light you can switch on and off (and sometimes change colour) with your code. LED is short for "light-emitting diode".Full entry → by coding our PicoBricks board.
What you'll learn
- How to control an LED using a button
What you'll need
- PicoBricks Kit
- PicoBricks Brick IDE
- MicroUSB to USB cable
- Laptop or tablet for coding
Key words
Button
A button is a switch you press to tell your project to do something. The code can check whether it's being pressed or not.
Real-world example: Pressing a doorbell is just like pressing a button, one press sends a signal that makes something happen.
LED
An LED is a tiny light you can switch on and off (and sometimes change colour) with your code. LED is short for "light-emitting diode".
Real-world example: The little standby light on a TV is an LED, your code can flash one on and off the same way.
Forever loop
A forever loop repeats its instructions again and again without ever stopping (until you switch off or reset). It's perfect for anything you want to keep happening over and over.
Real-world example: Like a clock's second hand that keeps ticking round and round, a forever loop keeps running the same steps over and over.
If statement
An if statement checks whether something is true, and only runs its instructions when it is. It's how code makes decisions.
Real-world example: "If it's cold, put on a coat." If it's warm, you skip the coat, the action only happens when the check is true.
Set up your PicoBricks
- Open your favourite web browser. We recommend either Google Chrome or Microsoft Edge. Type ide.picobricks.com into the address bar.
- Connect the PicoBricks board to your computer using the USB cable.
- Connect the PicoBricks board to the Brick IDE by selecting the Connection button at the top of the code area.
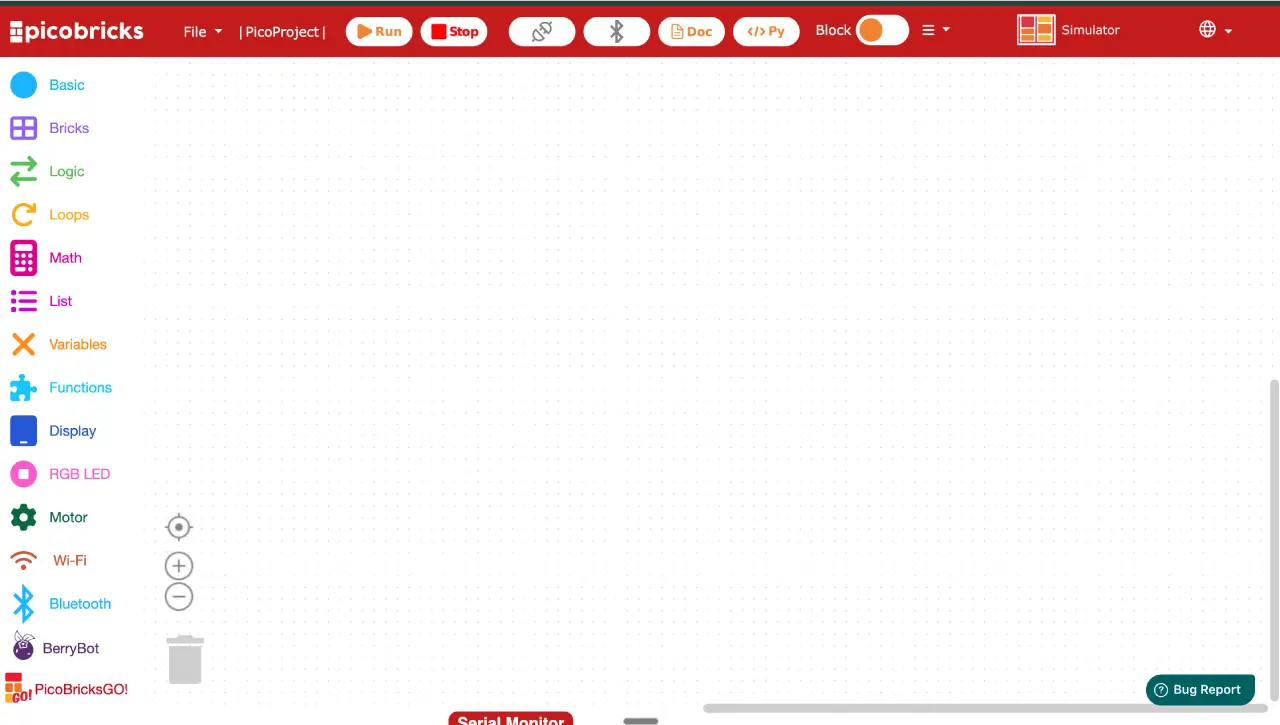
Build the code
- Select Basic. Select and drag a
PicoBricksblock to the code area and drop it. - Select Loops. Select a
foreverblock and snap it to thePicoBricksblock. - Select Logic. Select an
if elseblock and snap it inside theforeverblock. - Select Logic. Select an
=block and snap it onto theifblock. - Select Bricks. Select a
Read Buttonblock and snap it within the first blank space of theifblock, before the = sign. - Select Math. Select a
0block and snap it in the blank space after the = sign. Change the 0 to 1. - Select Bricks. Select a
Set Led onblock and snap it within theifblock. - Select Bricks. Select a
Set Led onblock and snap it within theelseblock. Change the on to off.
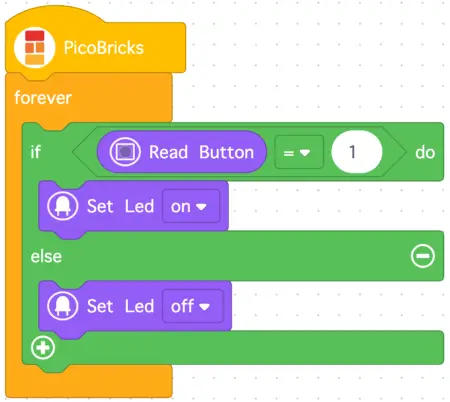
We've now completed the code for our button-controlled LED.
Run it and watch
- Select the run button at the top of the code window.
- Press the button on your PicoBricks board.
When the button is pressed you should see the LED turn on, and switch off again when you let go. 🎉
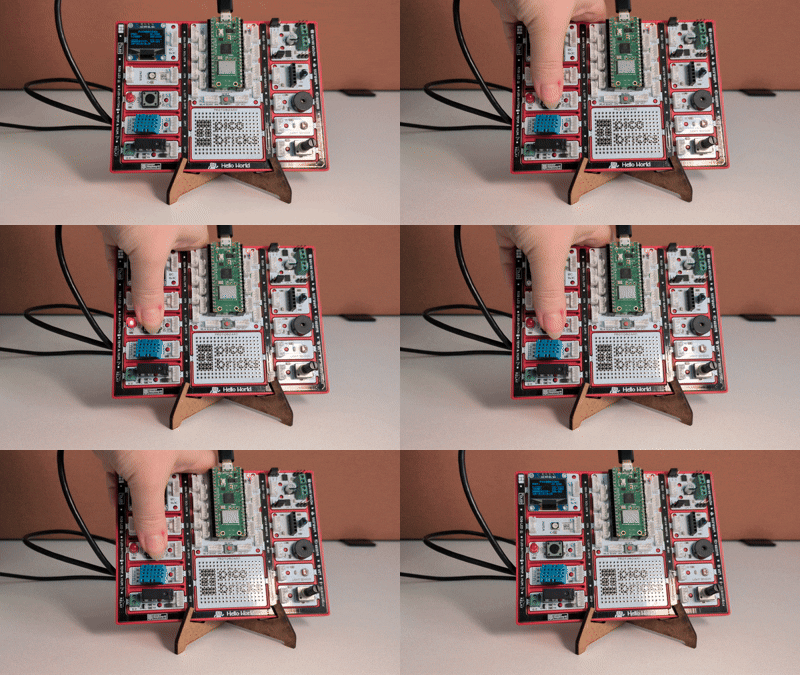
Try it yourself
Challenge: Now you can switch a light on with a button, what else could you control? Try swapping a Set Led block for a different brick, like making the buzzer beep while the button is held down. Can you get two things to happen from one press?
Stuck? Quick fixes
| Problem | Try this |
|---|---|
| The LED doesn't come on when I press the button | Check the USB cable is pushed in at both ends and that the Brick IDE shows it's connected to your PicoBricks board. Then check the Read Button block is snapped into the if block, before the = sign. |
| The LED stays on all the time | Look at your if and else blocks and make sure the right Set Led block sits inside each one, so the light knows when to switch on and when to switch off. |
| The blocks won't snap together | Drop each block just inside the one above it. The if else block needs to sit inside the forever loop, and the Read Button, = and 0 blocks all tuck into the top of the if. |
| Nothing happens when I press run | Reconnect the board using the Connection button at the top of the code area, then press run again. Unplugging the USB cable and plugging it back in often helps too. |